|
section
three
chapter
six
the line art scan
Computers
haven't changed the basic method of comicbook coloring.
Only the tools are different (fig 1). Artists used
to take their original line art to a photostat shop and
have two copies made, the first on clear acetate, the second
in non-repro blue on a piece of illustration board. They'd
color the blueline board and the acetate image would overprint
the color art on press. The process was awful, but it made
for dark and crispy blacks.
 |
|
fig
1 Digital
technology has changed art faster than
the capital-intensive printing technologies.
Coloring, as a result, is comprised of
the same steps now as before, but done
on computer instead of with a combination
of cameras and grubby paws.
Graphic
byGF Realizations. |
|
|
The only drawback was that the blueline and film cost about
40 bucks if you could find a stat shop that would make
a blueline, and if you couldn't you'd have to grovel to your
publisher to make the blueline. You'd usually have to ship
your original art to the publisher via FedEx on your own dime.
Then you'd get the blueline back invariably shot at a reduction
that was either too large or too small. You'd toil away in
some unforgiving medium that stuck to the back of the acetate
and made a huge mess. Finally, you'd send the art to a paste-up
guy, who'd actually peel the painted top layer off your illustration
board, ruining the original so he could roll it on his drum
scanner.
Not only is computer coloring cheaper and easier, it puts
more of the process in the hands of the artist. Comic artists
no longer have to surrender their original art. They just
e-mail it.
scanning
|
|
fig
2
First
I hand-draw the line art I´ll later color. This
is an illustration of the writer Charles Willeford.
The current technology doesn't require you to
draw on paper. Art software in combination with
an electronic palette can simulate pencil, pen,
and brush. But the result is similar to replacing
a real drummer with a midi keyboard it rings
phony.
Photo
by Ellen Sawyer.
|
|
The
goal is to make a high resolution bitmap of your black line
art. This requires a digital scanner. I use the Microtek ScanMaker
connected to a laptop PC with a Windows-based operating system.
IBM and Mac both support Photoshop, my coloring software,
so the following instructions apply to both.
Warning: the next discussion is pretty technical.
If you prefer aesthetic discussions, skip
ahead to the color and design section.
Step
1: I determine the final size of the printed artwork.
Standard comic page size is 6.62" x 10.19" with a smaller
image size, around 6" x 9.5". Some comics vary, so measure
past issues to be sure. Covers fill the page and bleed past
the edges, so when its a cover or any page that exceeds
trim extend the page 1/4" on all sides. (I hope you don't
intend to have most of your interior pages "bleed" we'll
talk aesthetics later.)
I open Photoshop, select File/New, and create a
bitmap (all black-and-white with no grays) page at
1200 dpi (dots-per-inch) resolution at the exact size of
the final printed page.
Step 2: I select File/Import and pick my
scanner's driver. The little interface menu allows me to
customize my scan. I select line art (bitmap) mode. I select
1200 dpi resolution so all the type and fine lines read
properly. This creates a massive file, but I save it in
TIFF format with LZW compression, a Photoshop check-box
that reduces the file size.
Next, I choose the percent by which the original image
size will be reduced to match the printed image size (a
rare practical use for high school algebra just divide
the printed size by the original size to get the scaling
factor). Finally, I use my scanner's advanced options menu
to set the image tolerance around 140, which eliminates
the dropout of fine lines but doesn't close the spaces in
the hatch marks. Basically, I eyeball the tolerance settings
till the art looks clean and strong.
Step 3: I scan the art in pieces. My scanner bed
only fits 8.5" x 14," so I´ll scan half of the image, cut
it out with the marquee tool, and paste it into the empty
page I made in Step 1. I´ll center it up using guidelines
so it fits like a printed image. Then I´ll scan the other
half, cut it out with the marquee tool and paste it over
the first half into its own "layer." I´ll scootch it around
till the two halves form a continuous image. It helps to
hit Ctrl-h, which hides the moving dotted line at
the edge of your selection. These steps are covered in greater
detail in fig 2.
|
|
fig
2 Steps
for scan-
ning large art.
|
|
|
|
|

|

|

|
|
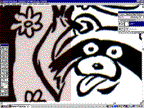
(a)
The second half of the scanned art is pasted
over the first half, into its own layer. The
top layer is shown as white and the bottom
tinted in these illustrations.
|
(b)
The two halves are brought together using
the "move" arrow.
|
(c)
The magnifying glass
tool reveals that the halves are still not
perfectly joined.
|
|

|

|

|
|
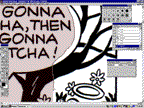
(d)
With the move tool selected, the keyboard
arrow keys move the top half one pixel at
a time till the halves are perfectly joined.
|
(e)
Finally, as much of the top layer as possible
is cut away using the lasso tool (and Edit/
Clear) until the seam between the two halves
is imperceptible.
|
(f)
The art is cleaned up as much as possible
and the layers are flattened.
Art:
Renée French and Gene Fama.
Graphic by GF Realizations.
|
|
Step 4: Finally, I take the lasso tool and cut away
redundant chunks of the top-layer image, usually along panel
gutters and empty spaces, revealing as much as I can of the
image in the layer underneath. The goal is to create a seamless,
continuous image.
Step 5: I select Layer/Flatten Image. I now
have a single illustration to work with. I´ll clean it up
with the Photoshop toolkit, using the lasso to clear out
any little flecks of crap that got scanned. I´ll even fix
drawing mistakes with my pen palette. I pay especially close
attention to all the tweaked lettering, centering stray
word balloon type and correcting my numerous spelling errors.
Basically, I aim to get my line art as final as possible,
because it'll be impossible later. Now I'm ready to color.
next
page: step-by-step coloring
|